


Introduction
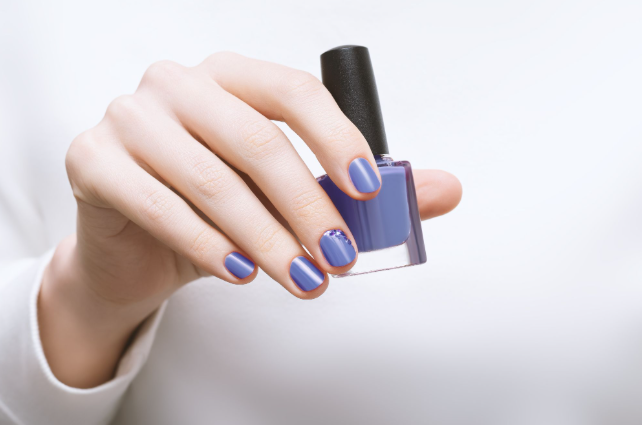
A polished manicure instantly elevates your look, making your hands appear neat, stylish, and well-groomed. While painting your nails might seem as simple as “coat and dry,” achieving a smooth, long-lasting finish is all about technique and preparation.
Many people struggle with streaky colour, uneven coats, or polish chipping after just a day or two. These issues usually stem from inadequate nail prep or rushing the application process.
Doing your manicure at home is both practical and creative. It saves time and money while allowing you to experiment with different nail polish colours, from bold shades to subtle, minimalist designs. In this guide, you’ll learn how to properly prep your nails, apply thin layers, and enjoy a professional-looking finish that lasts.
Quick Answer: How Do You Get a Perfect Manicure?
Start with clean, oil-free nails by wiping the nail plate with remover or alcohol. Apply a base coat, followed by two thin layers of colour using the “three-stroke” method. Finish with a top coat, making sure to lightly seal the free edge of the nail to prevent early chipping. With patience and care, this technique produces a salon-quality finish at home.
Key Takeaways
A flawless manicure is built on preparation, precision, and patience. Here’s what matters most:
Prep Matters
Polish adheres best to clean, dry nails. Removing oil and residue improves durability.
Thin Layers Work Better
Multiple thin coats dry faster and look smoother than one thick layer.
Seal the Edges
Lightly brushing polish across the nail tip prevents premature chipping.
Allow Proper Drying Time
Rushing the process often causes bubbles and smudges.
Aftercare Is Important
Cuticle oil and hand cream maintain healthy nails and prolong the life of your nail polish.
By keeping these principles in mind, you’ll avoid common pitfalls and ensure your nail polish looks as professional as possible.
Preparing Your Nails Before Applying Polish
Proper preparation is the foundation of any great manicure. Nails that aren’t prepped properly can cause polish to lift, chip, or appear uneven.
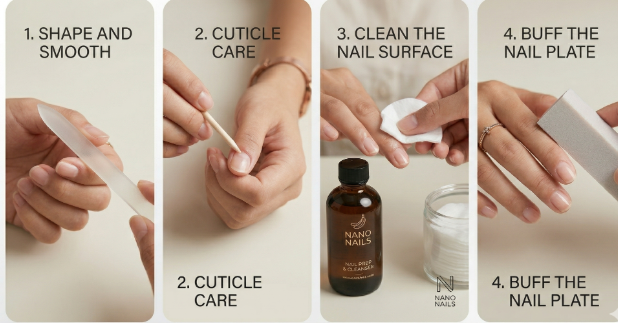
Shape and Smooth
Start by shaping the nails with a nail file. File gently in one direction to prevent splitting. Smooth edges help polish apply evenly.
Cuticle Care
Softened cuticles should be pushed back carefully using a wooden stick or cuticle pusher. Avoid cutting them, as cuticles protect the nail bed from bacteria.
GIG - CUTICLE TRIMMER
Clean the Nail Surface
Before applying polish, remove oils and dust. Wipe each nail with remover or alcohol. This step creates a clean surface so nail polish adheres properly.
Buff the Nail Plate
Lightly buff the nail surface to remove ridges. Avoid excessive buffing, as thinning the nail plate can weaken nails.
By taking the time to prep your nails correctly, you set yourself up for a manicure that lasts longer and looks smoother, whether you’re using traditional polish or gel nail polish.
Step-by-Step Nail Polish Application
Getting a smooth, professional-looking manicure is all about technique, not just the colour you choose. The “three-stroke” method is a simple trick that ensures even coverage without streaks or thick patches.
Step 1: Apply Base Coat | A base coat protects the natural nail and improves colour adhesion. It also prevents staining from darker nail polish colors. |
Step 2: Apply the First Colour Layer | Use the three-stroke method. Place the brush near the cuticle and swipe upward through the centre of the nail. Then paint each side. The first coat should remain thin. Thick layers take longer to dry and can wrinkle. |
Step 3: Apply the Second Colour Layer | The second layer builds opacity and deepens the colour. Two thin coats usually create the best finish. This is the stage where creativity begins. You can experiment with bold shades, pastel tones, or a nail polish simple design such as minimalist lines or dots. |
Step 4: Cap the Nail Edge | Run the brush lightly across the tip of the nail. This seals the colour and prevents early chipping. |
Step 5: Apply the Top Coat | A top coat protects the manicure from scratches and fading. Glossy top coats enhance shine, while matte options create a modern finish. Many people also use clear nail polish as a protective top layer to extend the life of their manicure. |
By following these steps carefully, your manicure will look professional and last longer, whether you choose a bold hue or a gel nail polish finish.

ARTDECO - ART COUTURE NAIL LACQUER
Common Nail Polish Mistakes and How to Avoid Them
Even seasoned nail enthusiasts can make mistakes. Here’s what to watch out for:
Shaking the Bottle
Shaking creates air bubbles in the formula. Instead, roll the bottle gently between your palms before applying.
Flooding the Cuticle
Allow a tiny gap between polish and skin. If polish touches the cuticle, it can lift and cause chipping.
Applying Over Wet Layers
Each coat should dry for at least two minutes before applying the next. If the base layer remains wet, the manicure will remain soft.
Using Thick or Old Polish
Old formulas may become stringy and difficult to apply. If necessary, add a few drops of polish thinner to restore consistency.
Avoiding these mistakes ensures a smooth, long-lasting finish and makes applying both traditional and gel nail polish much easier.
How to Make Nail Polish Last Longer Without Chipping
Once your manicure is done, a few careful habits can help it last:
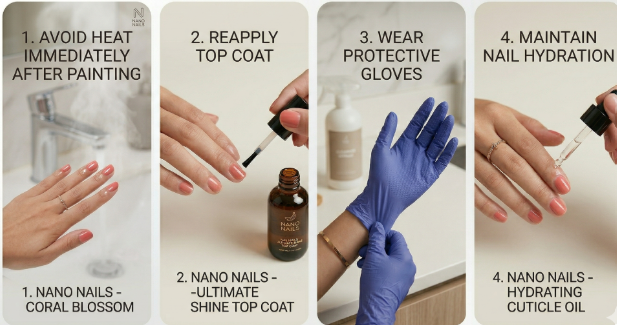
Avoid Heat Immediately After Painting
Hot water can soften freshly applied polish. Avoid showers or dishwashing for at least two hours.
Reapply Top Coat
Adding a fresh layer of top coat every few days refreshes shine and strengthens the polish barrier.
Wear Protective Gloves
Cleaning products and chemicals can weaken polish. Wearing gloves during chores helps preserve your manicure.
Maintain Nail Hydration
Healthy nails are flexible and less prone to chipping. Apply cuticle oil daily to maintain nail strength and shine.
These habits help extend the lifespan of nail polish colors and maintain a neat appearance.
Nail Care Tips After Polish Application
Post-application care is just as important as the manicure itself. Caring for your nails ensures longevity and maintains nail health:
Clean Up Edges
If polish spreads onto the skin, use a small brush dipped in remover to tidy the edges.
Keep Skin Hydrated
Hand creams with vitamin-rich ingredients maintain smooth skin and prevent dryness around the nails.
Remove Polish Safely
When changing colours, soak cotton pad with remover and hold on nail briefly before wiping. Avoid scraping polish, as it can damage the surface.
Even long-lasting gel polish requires gentle removal to protect the nail bed and prevent breakage.
In Short
A flawless manicure starts with proper preparation and thoughtful application. Thin layers, careful drying, and sealing the edges ensure polish lasts longer and looks smooth.
Experimenting with nail polish colours or minimalist designs allows you to express creativity while keeping your nails neat and professional-looking. A protective top coat or clear polish further extends the life of your manicure, keeping it chip-free and shiny.
With practice and patience, painting your nails at home becomes a simple, enjoyable routine that leaves you looking polished and confident every day.
Frequently Asked Questions (FAQs)
1. How do I prepare my nails before applying polish?
Start with clean, dry nails, gently shape them, push back cuticles, and remove oils so the nail polish adheres better.
2. What is the correct order for applying base coat, colour, and top coat?
Apply a base coat first, then two thin layers of nail polish, and finish with a top coat to seal and protect the colour.
3. How many coats of nail polish should I apply for the best finish?
Two thin coats of nail polish colors usually provide smooth, even coverage and longer-lasting results.
4. How do I avoid streaks and bubbles in nail polish?
Apply thin layers, avoid shaking the bottle, and allow each coat of nail polish to dry before adding the next.
5. How can I make nail polish last longer without chipping?
Seal the nail edges, apply a top coat, and maintain nails with cuticle oil to help nail polish stay chip-free longer.

Featured Products in this Post


Related Posts
How to Dry Hair Without Causing Frizz or Breakage | Correct Technique Guide
Best Cleansing Oils & Balms for Removing SPF and Makeup Singapore

Best Facial Tools for Your Skincare Routine | Gua Sha, Rollers & Cleansing Devices

Aloe Vera Benefits for Skin | What It Does and How to Use It

How to Get Clear Skin in Singapore's Humid Climate | Skincare Tips & Routine